
Drywall Repair Liberty
High-quality Sheetrock Repair Company in Liberty, Arizona
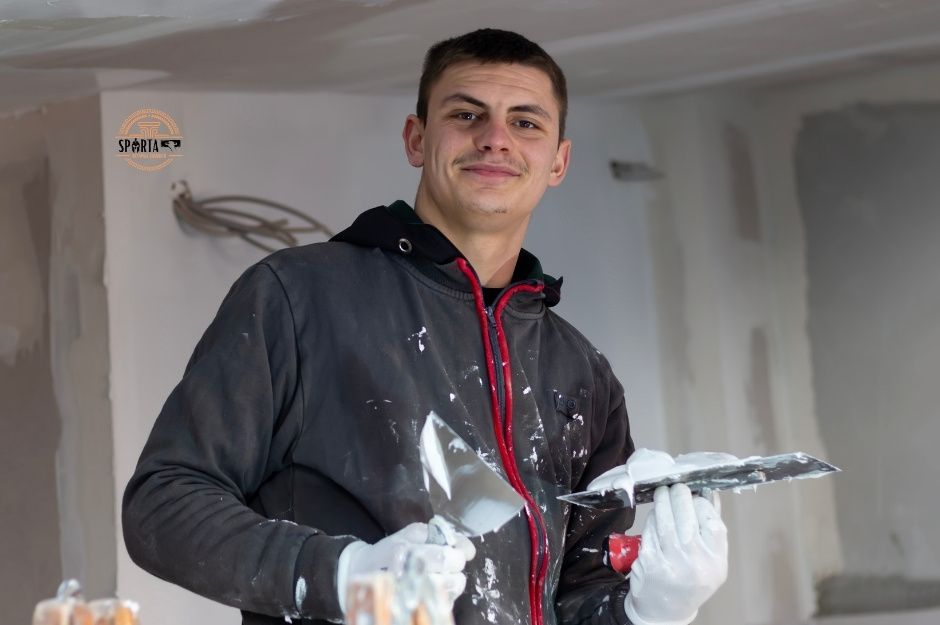
Your home's drywall plays a crucial role in both aesthetics and structural integrity. When issues arise, from small holes to water damage, professional repair services at Sparta Drywall Chandler in Liberty, Arizona can restore your walls and ceilings to pristine condition. These contractors offer comprehensive solutions including patch repairs, crack fixes, popcorn ceiling restoration, corner bead installation, and water damage remediation.
Liberty's experienced drywall professionals bring decades of expertise to every project. Located at the intersection of South Jackrabbit Trail and West Baseline Road in Maricopa County, Liberty serves as a central hub for drywall services extending to the broader Buckeye and Goodyear areas. Whether you need a simple patch job or complete drywall installation, these skilled technicians use industry-leading techniques and materials to ensure lasting results. The repair process typically involves assessing the damage, preparing the surface, applying the appropriate materials, and finishing with expert texturing to match your existing walls.
As a small community approximately 30 miles west of Phoenix, Liberty offers personalized service with the expertise you'd expect from metropolitan contractors. From minor dents to major renovations, proper drywall repair requires attention to detail and specialized knowledge. You can trust Liberty's qualified contractors to handle every aspect of your project, from initial consultation through final inspection. Their comprehensive services ensure your walls and ceilings maintain their structural integrity while providing a flawless appearance that enhances your home's value.

Sparta Drywall Chandler

Comprehensive Drywall Repair Services in Liberty, Arizona
Professional drywall repair services in Liberty address common wall and ceiling damage through specialized techniques and expert craftsmanship. With Liberty existing as a county island within Buckeye's corporate boundaries, residents benefit from specialized local contractors who understand the unique building challenges of desert communities. Local contractors use industry-standard materials and proven methods to restore damaged areas to their original condition.
Patch a Hole or Dent
Small holes from door handles or picture frame hooks require basic patching with drywall compound and mesh tape. For larger holes, contractors cut the damaged section into a clean square and install a new drywall piece.
Professional repair teams match existing wall textures precisely using specialized tools and techniques. Liberty contractors are particularly experienced with addressing damage common in Arizona's desert climate, including expansion-related cracks and settling issues that affect homes throughout Maricopa County. This ensures seamless integration with surrounding surfaces.
Your repair service will sand, prime, and paint the patched area to match existing wall colors. Most contractors in Liberty complete small patch jobs within 2-4 hours.
Crack in Ceiling Repair
Ceiling cracks often result from house settling or temperature changes. In Liberty's desert environment, extreme temperature fluctuations between day and night can cause significant expansion and contraction in building materials. Repair professionals evaluate the crack's cause before starting work to prevent future issues.
The repair process involves cleaning the crack area, applying fiber tape, and layering joint compound. Multiple thin coats create stronger repairs than single thick applications.
Texture matching is crucial for ceiling repairs. Liberty contractors use spray equipment and hand techniques to recreate common textures like knockdown or orange peel.
Water Damage Restoration
Water-damaged drywall requires immediate attention to prevent mold growth. Professionals first locate and fix the water source, then assess the damage extent. While Liberty receives minimal annual rainfall, monsoon season and occasional plumbing issues in homes dating back to the community's establishment in 1901 can create significant water damage challenges.
Contractors remove all wet material beyond the visible damage area. They use moisture meters to ensure complete removal of affected drywall.
Installation of new moisture-resistant drywall helps prevent future water issues. The area receives proper ventilation during drying and repair phases.
Corner Bead and Joint Repair
Damaged corner beads create unsightly wall edges and risk further deterioration. Repair teams remove loose material and install new metal or vinyl corner beads.
Joint repairs focus on tape separation and nail pops. Contractors recess protruding nails, apply new tape, and rebuild proper joint layers.
These repairs require careful feathering of compound to create smooth transitions. Most corner and joint repairs take 1-2 days with drying time between coats.
Ceiling Solutions: Popcorn Ceiling Repair and Ceiling Restoration
Professional ceiling repairs protect your home's value while creating a fresh, modern appearance. Many homes in Liberty feature vintage architectural elements from the community's early 20th century development, including popcorn ceilings that were popular during mid-century construction booms. Expert technicians use specialized tools and proven techniques to restore damaged ceilings and match existing textures perfectly.
Popcorn Ceiling Repair and Removal
You have multiple options for addressing damaged popcorn ceilings. A skilled drywall contractor can patch damaged areas and match the existing texture, or completely remove the dated popcorn finish.
For small repairs, technicians carefully scrape the affected area, apply joint compound, and recreate the popcorn texture to blend seamlessly with surrounding sections.
Full popcorn removal starts with protecting your floors and furniture. Liberty contractors are particularly cautious about potential asbestos in popcorn ceilings installed before 1980, a concern relevant to many of the community's older homes built during its agricultural era when it was known as Altamount and later Toothaker Place. The ceiling surface is moistened to soften the texture before careful scraping. Once removed, the underlying drywall receives repairs and finishing to create a smooth surface.
Matching Ceiling Texture
Texture matching requires extensive experience and specialized tools to achieve natural-looking results. Professional contractors analyze your existing ceiling pattern to determine the proper technique.
Common ceiling textures include:
- Knockdown
- Orange peel
- Stipple
- Smooth finish
The matching process involves applying joint compound in thin layers and manipulating it with specific tools to recreate the original pattern. Each layer must dry completely before adding the next.
Ceiling Surface Repairs
Common ceiling damage includes:
- Water stains from roof or plumbing leaks
- Cracks along seams and corners
- Nail pops pushing through the surface
- Corner bead separation
Professional repairs start with identifying and fixing the underlying cause. Damaged sections of drywall are cut out and replaced when necessary.
Joint compound is applied in multiple thin coats, with proper drying time between layers. Each layer is carefully sanded to create a perfectly smooth transition to undamaged areas.
Professional Drywall Installation and Finishing
Professional drywall contractors employ precise techniques for drywall installation and drywall finishing to create smooth, durable walls and ceilings. Liberty contractors serve not only the local community of approximately 63 residents but also support the broader Liberty Elementary School District area, which extends throughout surrounding Buckeye and Goodyear neighborhoods. Their expertise ensures proper measurements, secure fastening, and flawless finishing that meets industry standards.
New Drywall Installation Process
Your drywall installation begins with accurate measurements and cutting of sheets to fit the space perfectly. Professionals secure the panels to wall studs or ceiling joists using specialized screws at proper intervals.
Installers place drywall sheets horizontally on walls to minimize seams and maximize structural integrity. They maintain consistent gaps between panels and cut precise holes for electrical outlets and fixtures.
Critical Installation Steps:
- Measuring and marking stud locations
- Cutting sheets to exact dimensions
- Installing moisture barriers when needed
- Securing panels with proper screw patterns
- Setting corner beads for edge protection
Expert Drywall Finishing Techniques
Professional finishers apply multiple layers of joint compound to create invisible seams between panels. Each layer serves a specific purpose in achieving a seamless appearance.
The first coat embeds paper tape into compound over joints and inside corners. Subsequent coats gradually widen to feather edges smoothly into surrounding surfaces.
Finishing Layers:
- Base coat with tape
- Second coat for build-up
- Final coat for smooth blending
- Light sanding between coats
Seamless Surface Preparation
Surface preparation transforms raw drywall into walls ready for paint or texture. Professionals sand between coats using appropriate grit levels to achieve optimal smoothness.
They inspect surfaces under strong lighting to identify any imperfections. Small holes or dents receive spot treatment with lightweight compound.
Quality Control Checklist:
- Complete surface inspection
- Uniform sanding technique
- Dust removal
- Final touchups
- Primer preparation
Enhancing Interiors with Painting and Restoration Services
Professional painting services complement drywall repairs to create flawless interior spaces. With Liberty's rich history dating back to its founding as Altamount and later renamed after the post office relocation in 1901, many homes feature historical character that requires careful restoration techniques. Expert color matching and proper preparation techniques ensure seamless transitions between repaired areas and existing walls.
Interior Painting After Drywall Work
Your newly repaired drywall requires proper preparation before painting begins. Prime all patched areas to create a uniform surface texture and prevent flashing - where repaired spots appear different from surrounding areas.
Allow sufficient drying time between primer and paint coats. Most professionals recommend 24 hours for optimal results.
Choose paint finishes based on the room's purpose. Recommended finishes include:
- Flat: Ideal for low-traffic areas and ceilings
- Eggshell: Perfect for living rooms and bedrooms
- Satin: Great for hallways and children's rooms
- Semi-gloss: Best for trim and high-moisture areas
Integrating Drywall and Painting Projects
Coordinate drywall repairs and painting work to maximize efficiency. Schedule painting only after repairs are fully cured and sanded smooth.
Test paint colors on your repaired walls under different lighting conditions. Liberty's desert location provides intense natural light that can significantly affect paint appearance, making proper color testing essential for achieving desired results. Natural and artificial light can significantly affect how colors appear throughout the day.
Professional painters use specialized tools to blend repaired areas seamlessly:
- Fine-grit sandpaper for smooth transitions
- High-quality rollers for consistent texture
- Angled brushes for precise cutting-in
Apply two coats of paint for complete coverage and a professional finish. This ensures repaired areas match perfectly with existing walls.